Are you ready to enhance your Harley-Davidson's sound and performance? Installing a new muffler can make a significant difference. It not only gives your bike a powerful growl but also improves fuel efficiency and exhaust flow. In this guide, we’ll walk you through the entire process of installation.
Whether you're a seasoned mechanic or a first-time DIYer, this article will provide you with the knowledge you need to tackle the job confidently. Let’s dive into how you can transform your ride with a new muffler!
Understanding the Importance of a Muffler
How a Muffler Affects Performance
A muffler plays a crucial role in your Harley-Davidson's performance. It reduces engine noise and improves exhaust flow. This leads to better fuel efficiency and increased horsepower. Here’s how:
- Noise Reduction: A good muffler keeps your ride quiet, which is essential for a pleasant driving experience.
- Exhaust Flow: A high-performance muffler enhances exhaust flow, allowing your engine to breathe better.
- Fuel Efficiency: Better flow means your engine works less, saving fuel in the long run.
Choosing the Right Muffler for Your Harley-Davidson
Selecting the correct muffler is vital. It can influence your bike's sound, performance, and style. Here are some tips:
- Sound Preference: Consider how loud you want your bike to be. Some prefer a deep growl, while others want it quieter.
- Material: Mufflers come in various materials like stainless steel and aluminum. Stainless steel is durable and resistant to rust.
- Fit and Compatibility: Ensure the muffler fits your specific Harley-Davidson model for optimal performance.
Research different brands and read reviews. This will help you make an informed decision.
Tools and Materials Needed for the Installation
Essential Tools for the Job
Before you start installing a new muffler on your Harley-Davidson Pan America, gather the necessary tools. Here’s what you’ll need:
- Socket set (including metric and standard sizes)
- Torque wrench for precise tightening
- Screwdrivers (flathead and Phillips)
- Wrenches (open-end and box-end)
- Pipe cutters (if modifying existing pipes)
- Safety goggles and gloves for protection
Having the right tools will make your installation smoother and quicker.
Recommended Muffler Brands
Choosing a quality muffler is crucial for performance and sound. Here are some top brands to consider:
- Screamin' Eagle - Known for performance enhancements
- Vance & Hines - Offers a variety of styles and sounds
- Rinehart Racing - Popular for deep, rich tones
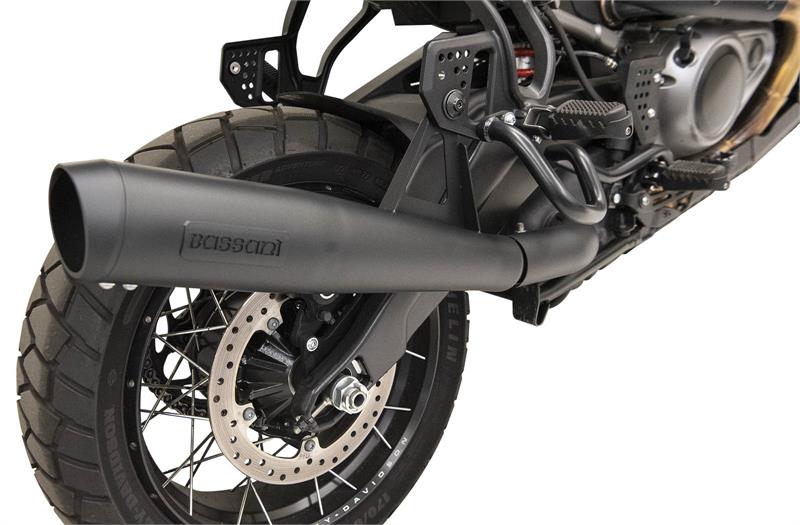
- Bassani - Focuses on high-quality construction
Selecting a reputable brand ensures durability and satisfaction with your Harley's performance.
Step-by-Step Guide to Installing Your New Muffler
Preparing Your Harley for Muffler Installation
Before you start, ensure your Harley-Davidson is parked on a level surface. Turn off the ignition and allow the bike to cool down. Gather the necessary tools:
- Socket wrench set
- Screwdriver
- Pliers
- New muffler
- Replacement gaskets (if needed)
Wearing gloves is also recommended to protect your hands.
Removing the Old Muffler
Start by locating the mounting bolts that secure the old muffler. Use your socket wrench to remove these bolts. Be careful not to damage the mounting brackets. You may need to:
- Loosen the clamps holding the muffler in place.
- Carefully slide the muffler off the exhaust pipe.
If the muffler is stuck, gently tap it with a rubber mallet. Once removed, inspect the old gaskets and replace them if necessary.
Installing the New Muffler
Position the new muffler onto the exhaust pipe. Ensure it fits snugly against the mounting brackets. Then:
- Reattach the clamps and tighten them securely.
- Use the socket wrench to fasten the mounting bolts.
Double-check that everything is tight. Finally, start your bike to ensure there are no leaks and that it sounds great!
Can You Install a New Muffler Yourself?
Assessing Your Skill Level
Before diving into the installation of a new muffler, it's crucial to assess your skill level. Consider the following:
- Basic Tools: Do you have the necessary tools like a socket wrench, screwdrivers, and a torque wrench?
- Experience: Have you worked on motorcycles before? Familiarity with your Harley-Davidson helps.
- Time: Do you have enough time to complete the job without rushing?
If you feel confident with these aspects, you can likely handle the installation yourself. Remember, taking your time is key.
When to Seek Professional Help
Sometimes, it’s best to call a professional. Here are a few scenarios:
- If you lack the right tools or workspace.
- If you’re unsure about the installation process.
- If your Harley has modifications that complicate the installation.
In these cases, a professional can ensure that your new muffler is installed correctly, helping you avoid potential issues down the road.
Common Issues and Troubleshooting
Dealing with Leaks
After installing your new muffler, you might encounter some leaks. Leaks can occur at the joints or connections. Here’s how to address them:
- Check all connections for tightness.
- Inspect the gaskets; they may need replacement.
- Use a high-temperature sealant if necessary.
Make sure to take your time during installation. A proper fit will help prevent leaks.
Handling Performance Issues Post-Installation
Sometimes, you may notice performance issues after installing a new muffler. This can include:
- Reduced power output.
- Strange noises or vibrations.
- Changes in fuel efficiency.
If you face these issues, consider the following:
- Check if the muffler is compatible with your model.
- Ensure all components are installed correctly.
- Consult a professional if problems persist.
Troubleshooting early can save you time and enhance your riding experience.
Maintaining Your Muffler for Longevity
To ensure your Harley-Davidson muffler lasts, regular maintenance is key. A well-maintained muffler not only enhances performance but also improves the overall sound of your bike.
Regular Inspections
Inspect your muffler periodically. Look for signs of wear and tear. Here are some common issues to check for:
- Rust or corrosion
- Loose or damaged mounting brackets
- Strange noises indicating internal damage
Addressing these issues early can save you time and money in the long run.
Cleaning Your Muffler
Keep your muffler clean to prevent buildup. Use a soft cloth and a mild cleaner. Avoid harsh chemicals that can cause damage. Regular cleaning helps maintain the appearance and functionality of your muffler.
Check Exhaust Leaks
Exhaust leaks can affect performance. Listen for unusual sounds while riding. If you suspect a leak:
- Perform a visual inspection
- Use soapy water to check for air bubbles
Fix leaks promptly to maintain optimal performance.
Professional Maintenance
Consider professional inspections at regular intervals. Mechanics can spot issues you might miss. They can also provide tips for keeping your muffler in top shape.
By following these maintenance tips, you can ensure your Harley-Davidson muffler remains in excellent condition for years to come.